Admin Menu
History Menu Item
The History Menu Item is used to view the tracking history of a single vehicle during a specified time period.
There are 3 selections you must make in order to view the truck history on the map:
- The Truck dropdown is used to select the vehicle
- The Date dropdown is used to select the starting date and starting time
- The Period dropdown defines the period of time in hours
To view the History on the Map, click the "View History" button
To return to the History Menu after viewing the vehicle history on the Map, click the "To Admin" button on the upper right side of the screen.
Reports Menu Item
All reports are viewable in HTML format within your browser or in MS Excel format.
Driver Distance Reports
The Driver Distance Reports details the mileage total for the defined date range per selected truck. This report can be viewed for all trucks or a single truck.
Speeding Report
The Speeding Report details the date and time the truck exceed the Max Speed Limit setting (as defined within the Company Settings menu item) as well as the exact speed recorded by the GPS phone. Note: it is possible to receive a false reading due to the absence of an external GPS antenna. This report can be viewed for all trucks or a single truck.
State Mileage Report
The State Mileage Report details miles driven within each state for the date range requested. NOTE: The data displayed on this report is the approximate mileage distance based on the "as-the-crow-flies distance" between each GPS coordinate received. Therefore, this data is estimate of miles driven and is not the actual mileage based on "exact" road/highway mileage driven.
Stops Report
The Stops Reports details the elapsed time the truck was stopped for a time period that exceeds the Maximum Stopped Time (as defined within the Company Settings menu item). This report can be viewed for all trucks or a single truck. The Show Me button will present the user with a map with an icon detaining the location of the stop.
Vehicle Setup Menu Item
The Vehicle Setup menu is used to add Vehicles that will be tracked on the live map.
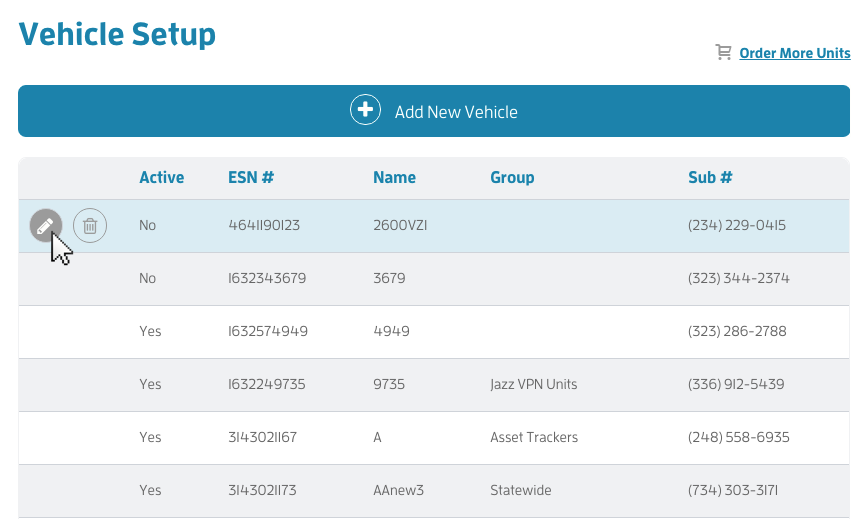
Note: When we ship you units, we will enter the ID and Phone numbers.
To add a user friendly Name for the vehicle, click on the edit icon to open the edit dialog.
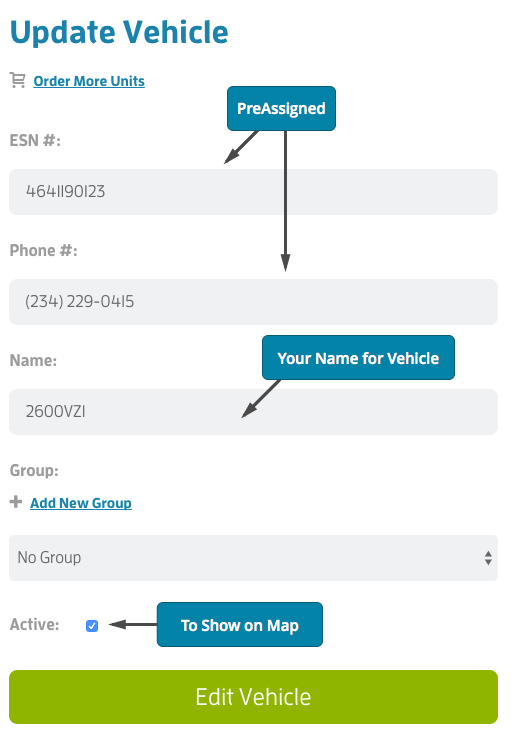
Within this menu, you will define the vehicle name or Alias name for each truck icon on the live map. From within this menu, you may also mark vehicles as active. Vehicles marked as active will track on the live tracking map.
From the main Vehicle setup menu, you are able to send a reboot command to each unit. This functionality is enabled for a single reboot per day. if you find you believe you need to reboot unit(s), this is generally a sign of a bad mounting position or possibly a wiring problem.
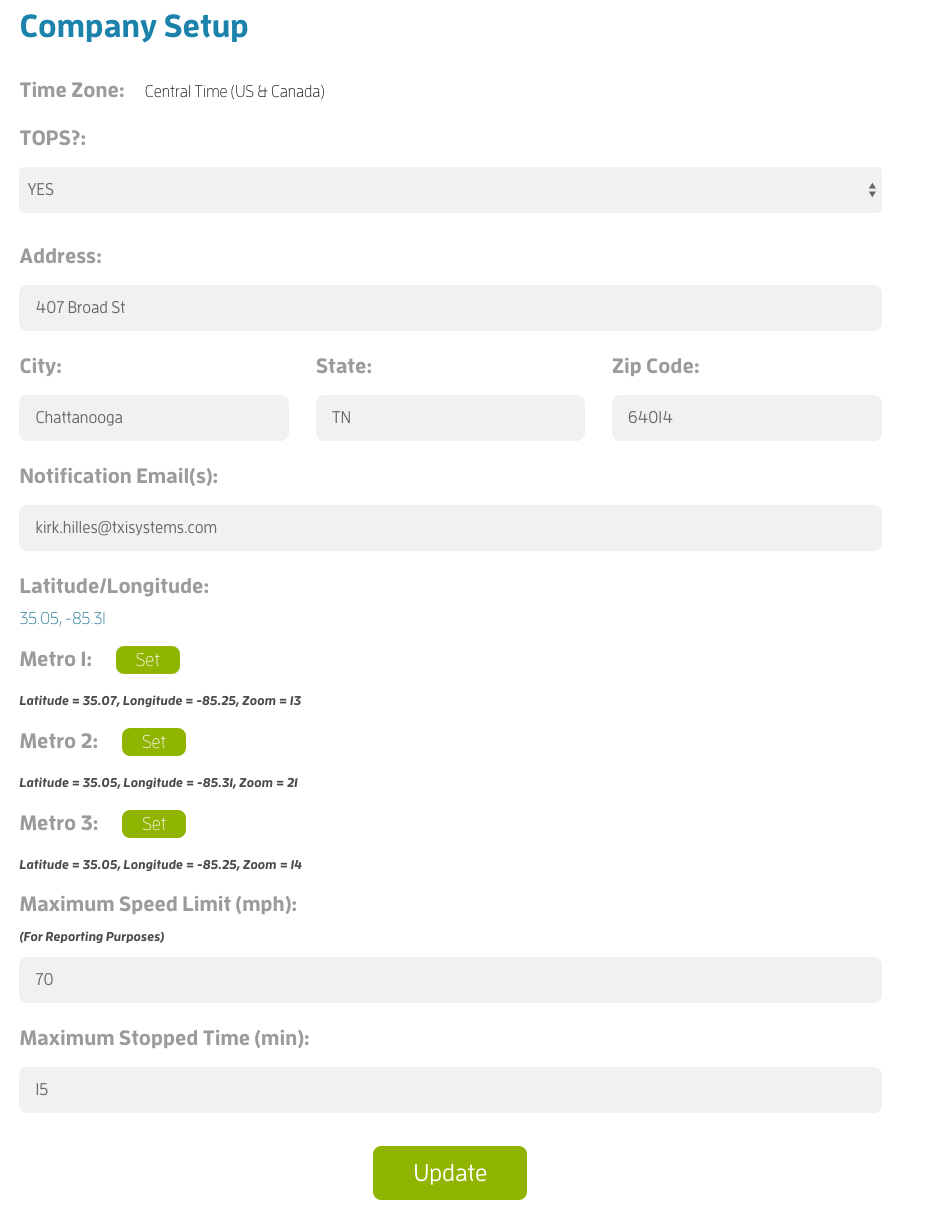
Company Settings Menu Item
The Company Settings Menu is used to define:
- The Address is the primary address of your business.
- Metro 1 Set - This setting will allow you to set a centerpoint and zoom level of the map and associate this map view with the Metro 1 button. This is designed to help users quickly adjust the map view to a new position and zoom level. (Click the SET button and follow the instructions presented in the dialog box.)
- Metro 2 Set - This setting will allow you to set a centerpoint and zoom level of the map and associate this map view with the Metro 1 button. This is designed to help users quickly adjust the map view to a new position and zoom level. (Click the SET button and follow the instructions presented in the dialog box.)
- Metro 3 Set - This setting will allow you to set a centerpoint and zoom level of the map and associate this map view with the Metro 1 button. This is designed to help users quickly adjust the map view to a new position and zoom level. (Click the SET button and follow the instructions presented in the dialog box.)
- The Maximum Speed Limit for the Speed Limit Report. (Speeds below this setting are filtered on the speeding report.) This speed definition is not associated with the Speeding Alerts setting.
- The Maximum Stopped Time for the Stops Report as well as defining the stopped time associated with trucks stopped on the live tracking map. This variable will define when the live tracking map will flag a vehicle as "Stopped" by adding a red Stop icon to the vehicle icon.
The Alerts Screen is designed for setting Speeding and Geofence Alerts.
Add New Speed Alert: This speed alert is not tied to the Speeding Report and is only used for sending email and SMS Alerts associated with Alerts.
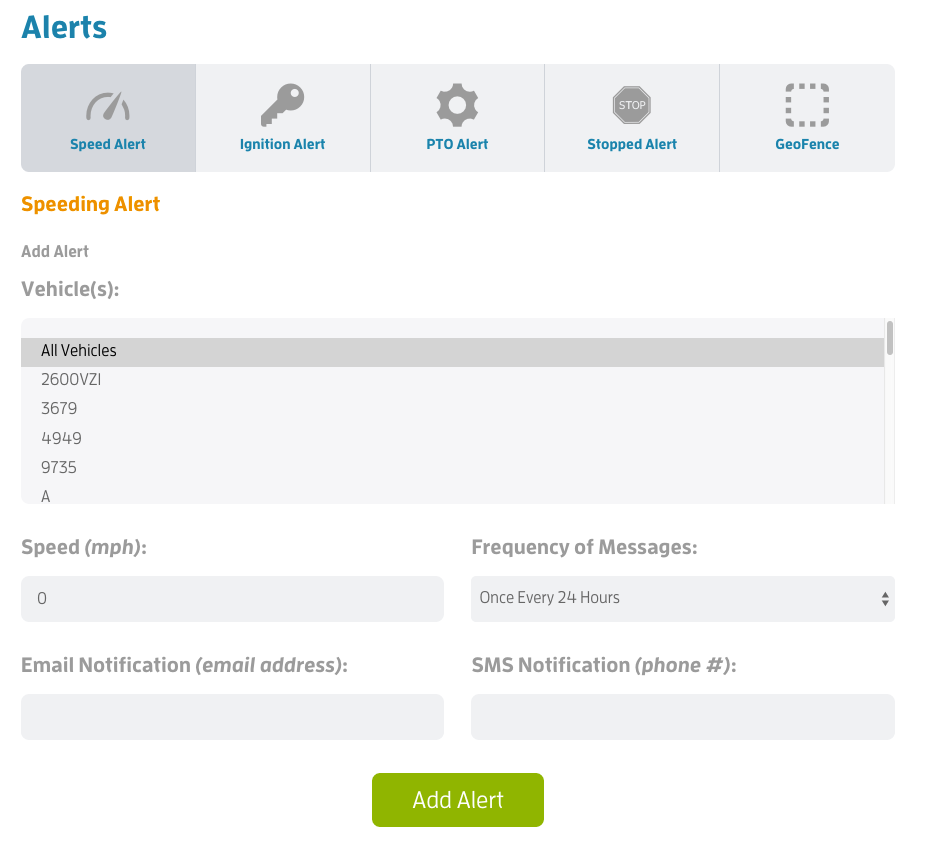
To Add a new Speed Alert, click the Add button to open the setup dialog.
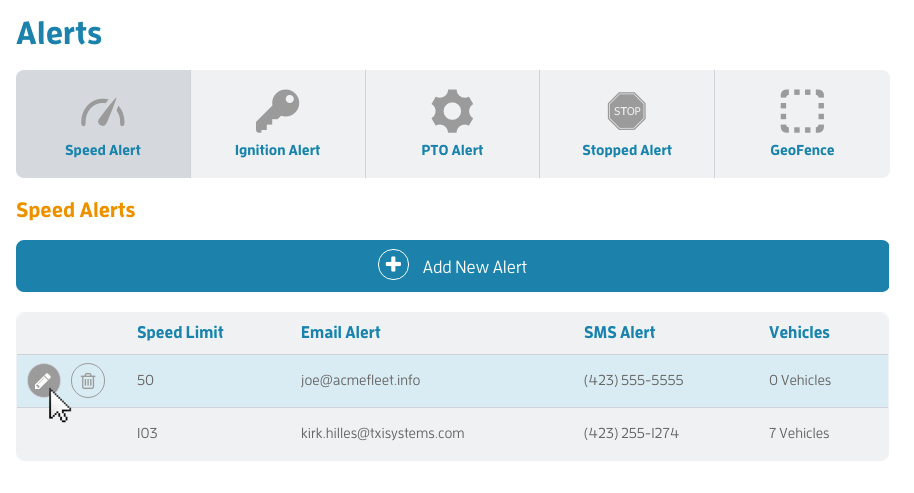
This notification is designed to "Notification" only. To review all details associated with Alerts, run the Alerts Report of the date range desired.
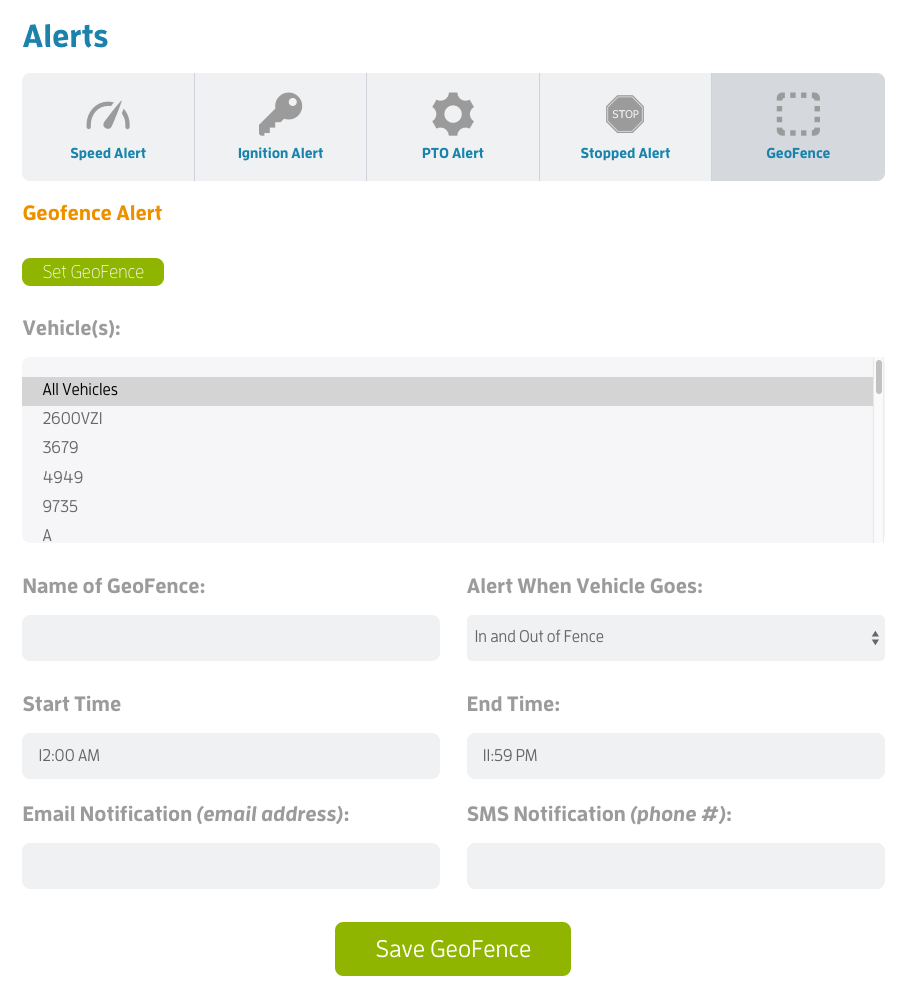
Set Geofence Alert: To create a fence around a certain map area, set GeoFence alerts. You may select to be notified when a vehicle enters into, moves out of or both in and out of an area.
To add an alert, start by clicking the Set GeoFence button and following instructions.
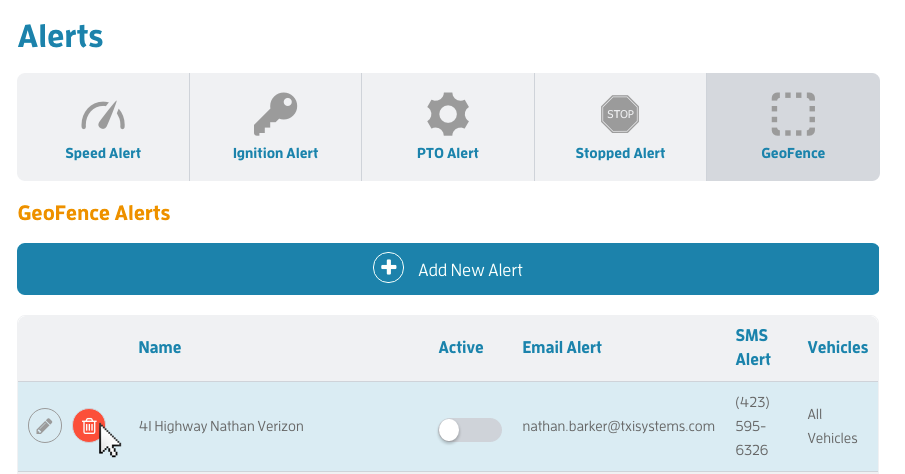
To Delete a GeoFence, click the Delete GeoFence Button.
The Places Setup Menu is used for adding icons to the map as landmarks.
Places icons will remain on the map until deleted through the Places interface.
To add a new Place to the map, navigate to the Places Setup item from the Admin menu.
Click the Add New Place button
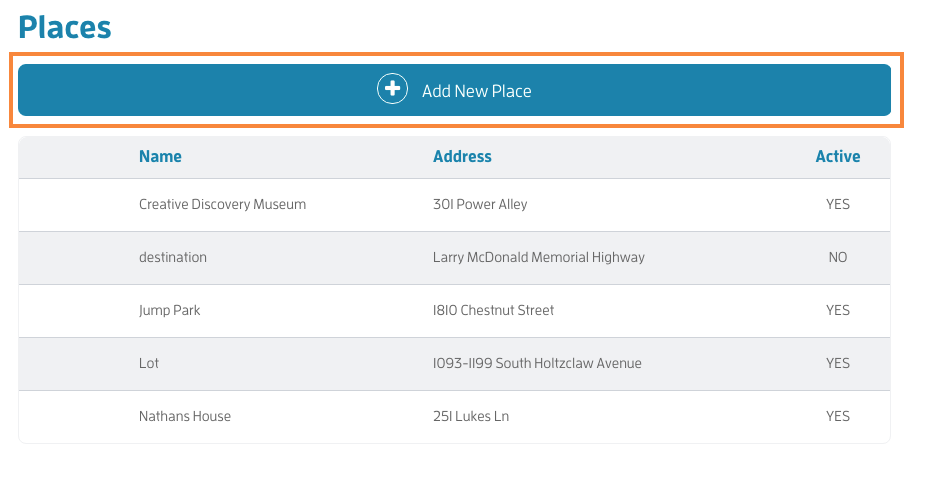
Add address information then click the Add button
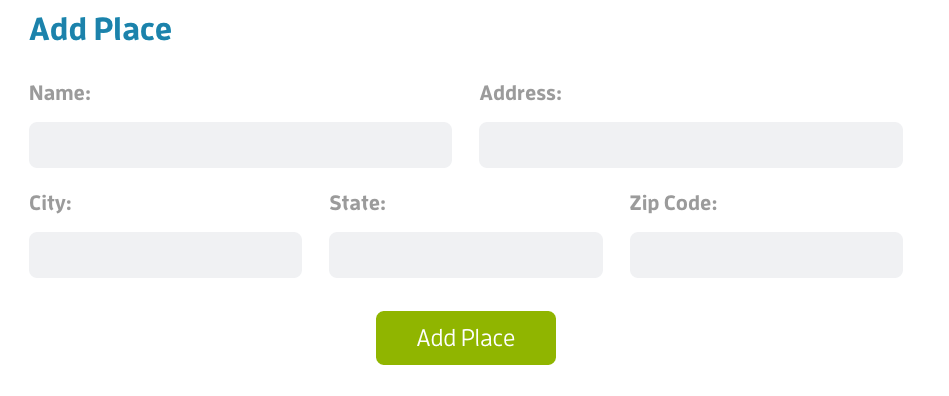
Once created, the icon will show on the map.
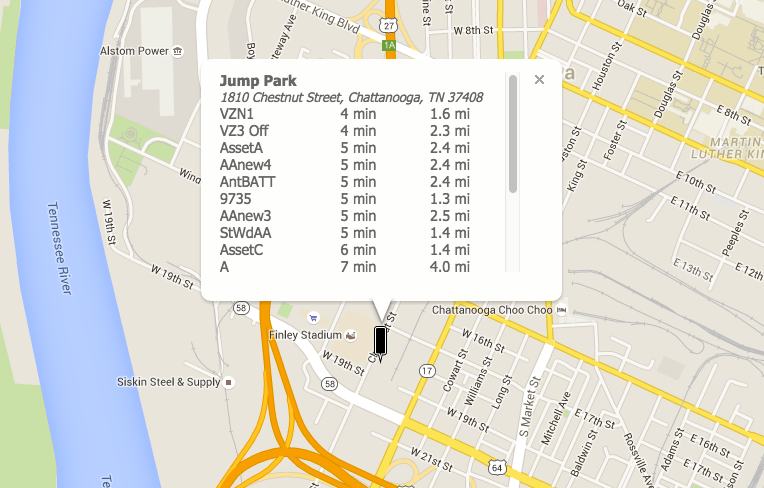
Clicking a Places icon on the map will show attributes about the Place as well as the closest vehicles to the place, highlighting drive time and mileage.
You can remove a Places icon by clicking the Remove link on the attributes popup.
Identifying Vehicles parked at a common location
Note: When clicking on a Place icon, the map willl return a complete listing of vehicles and their proximity to the Place. Using this tool allows users to identify those vehicles which are park at the Place.